Discovery Garden: tips from a plant expert so your dollars don't go to waste
Is your kitchen windowsill about to be bristling with Woolworths Discovery Garden pots? Take note of some handy tips and troubleshooting advice from a gardening expert, so your collecting efforts (and dollars) don’t go to waste.
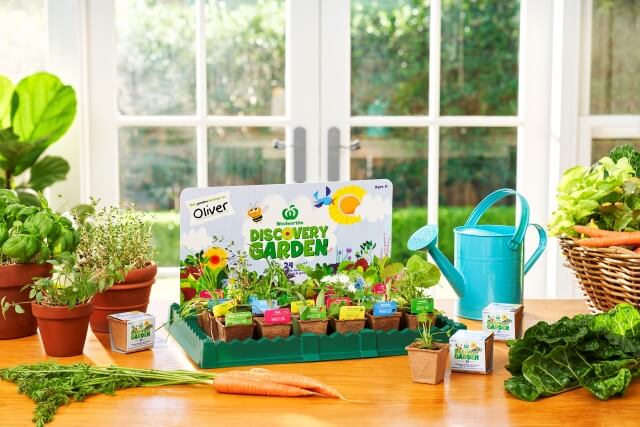
Woolworths Discovery Garden is back from Wednesday, 10 February. The promotional campaign sees shoppers receive one seedling kit with every $30 they spend.
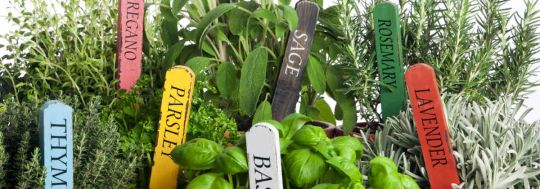
There are 24 different vegetable, herb and flower seeds to collect: spring onion, cabbage, carrots, cherry tomatoes, lettuce, spinach, silverbeet, red basil, chives, thyme, oregano, lemon balm, sage, cornflower, salvia, dianthus, phacelia, lavender, poppy, aster, zinnia, pansy and Swan River daisy.
Woolworths relished in the good green vibe when the supermarket chain first launched the Discovery Garden campaign in 2019, saying it hoped the promotion would inspire a new generation of green thumbs. This round is all about encouraging pollination through bee-attracting seedlings.
To help you get the best value from your collecting efforts, take note of lessons learned in the first round of Discovery Garden when Canstar asked Bunnings gardening expert Mill Wallasvaara to help solve some of the potential pain points.
I have collected a lot of Discovery Garden seedling kits – should I try and sprout them all at once?
If you’ve got a small backyard or balcony, it’s a good idea to stagger edible seed plantings a little so you can harvest them over longer periods of time. However, if you’ve got a more spacious garden or plenty of pots to plant them in, you can plant them all at once. Flower seedlings in particular can look great when planted all together and in bloom.
How do I work out which Discovery Garden seeds I should plant now?
Have a look online or in a good gardening book to see when the best time of year is for each plant type.
My Discovery Garden seedling kits have sprouted – what do I do with them now?
Once your seeds have sprouted, the seedlings need to be planted into a pot or garden bed so they can continue to grow and flourish.
How do I know when my Discovery Garden seedlings are right to plant in the ground or a pot?
When the seedlings have grown and opened their second set of leaves, they are large enough to be planted elsewhere. Keep an eye out for snails as they love to eat fresh seedlings.

Some of my Discovery Garden seedling pots have mould on them. How can I treat that? Is it ok to plant them out like that?
Bio pots will grow mould if they are sitting wet and not draining freely after they have been watered. Try moving the seedlings to a sunnier position like a windowsill and let the pots drain freely so they aren’t sitting in a saucer of water. It is okay to plant out pots with mould on them as the bio pots will break down in the soil with time anyway.
Do I need to feed my Discovery Garden seedlings?
Once the seedlings have grown their second set of leaves, they will start to require some fertiliser. When planting them, use some granular fertiliser or slow release fertiliser mixed into the soil. If you use a premium potting mix, this will not be required as fertiliser is included in the mix already. Just be sure to follow the instructions on the packaging, as using too much can damage young seedlings. Alternatively, a liquid fertiliser can be used once or twice a week, but again make sure to follow the instructions.
How often do I need to water my Discovery Garden plants?
Herbs and veggies require regular watering. Just how often varies depending on the position that they are in (e.g., if they are potted or planted in the ground and the soil type). As a general guide, herbs and veggies will require daily watering to keep them actively growing. The best way to check if plants need watering is to put your finger into the soil – if it is moist then the plants are happy. However, you also don’t want soggy soil, so make sure your herbs and veggies have plenty of drainage.
Fruiting plants (and trees) also require regular watering and again, the frequency varies depending on the position that they are in. However, if you have good quality soil (one that contains good organic matter and water holding ability), a deep watering (making sure the root system is completely drenched) once to twice a week will be enough in most cases. Deep watering is best as it encourages roots to grow down to the soil profile to access available water away from the soil surface, which can dry out quickly.
Water saving tips for gardeners:
- Add organic material: Adding organic material such as compost or rotted manure can help the soil hold more moisture and provides nutrients for your plants to grow.
- Add mulch: This can help your plants retain water and prevent weeds. This is important as weeds compete for water and nutrients with your plants and can also attract unwanted insect pests. Sugar cane mulch or pea straw are particularly good for veggies, herbs, flowers and fruiting plants as they help suppress weeds and retain water, as well as rotting down over time, which increases the organic matter in the soil.
- Use pots or planters: In very dry parts of Australia, growing herbs, veggies and flowers in pots or planters is a great way to help manage the watering. Using a good quality premium potting mix is also best as all the nutrients required to get a good result are already included. Add mulch on top of the soil of your plants to help keep the potting mix moist and a saucer to catch the run-off water.
There are more gardening tips on the Bunnings website.
Woolworths also has troubleshooting information on its Discovery Garden website. The advice includes:
Woolworths Discovery Garden video: Unboxing
Woolworths Discovery Garden video: How to get your seeds to sprout
Woolworths Discovery Garden video: What to do with your seedlings
Woolworths Discovery Garden video: How to harvest your produce
Discovery Garden: troubleshooting advice from Woolworths
The Woolworths Discovery Garden site also gives this advice in a list of frequently asked questions, a portion of which is reproduced below.
1. What is in each Woolworths Discovery Garden Seedling Kit?
- Seed mat – a small number of seeds of the same plant type e.g. herb or vegetable, are embedded in paper.
- Coco pellet – a pod made from coconut husk.
- Pot – a small seedling pot for putting the soil and seeds into.
- Plant label – a coloured cardboard label that will identify what’s growing in each pot.
2. Why are my Discovery Garden seeds not sprouting?
Seed performance is subject to growing conditions. Most seeds should sprout within one to two weeks of being planted, though some may take longer. However, some seeds may not germinate and if you’re still not seeing a seedling, it could be because:
- The soil hasn’t been wet enough or has been too wet.
- The seeds weren’t covered in enough soil.
- The coco pellet was packed down too tightly.
- The pots were put somewhere too windy, too cold or too hot.
3. The leaves of my Discovery Garden plant are turning yellow, what should I do?
This could be caused by various things. You might be over- or under-watering or your plant might be getting too much or not enough light.
4. Why are the roots of some plants outgrowing the pot?
If the roots are outgrowing the pot, it’s time to repot them. For more information on repotting, visit woolworths.com.au/repotting.
5. Can I leave the plants in the small pots when I repot them?
Yes, you don’t need to remove the plant from the pot. The pot is made from plant fibres so the seedling roots easily grow through the sides and the bottom of the pot.
6. I think insects are eating my plants, what should I do?
You could use a small amount of natural pesticide to protect your plants. Pesticides should only be applied by adults. Remember to read the instructions carefully.
7. Does it matter what sort of pot I use to repot the seedling?
No, just as long as it has drainage holes.
8. Why are my pots and plants mouldy?
The mould is caused by the moisture in the air. You can wipe it away with a tissue.
9. Where do I put the little seedling pot once I’ve planted the seeds?
You could use the collector’s tray which is specifically made for the seed pots ($4 from Woolworths, while stocks last, limit of five per person per transaction). Or put the pot on a clean saucer and in a light, warm place. Check the soil in the morning and at night to ensure it’s not too dry. Try to keep the soil just moist all the time. Once a little plant appears, a seed has germinated!
After germination you can find instructions on the inside of the Woolworths Discovery Garden seedling cardboard wrapper or at woolworths.com.au/discoverygarden. Make sure you don’t leave your little seedling pot anywhere too damp otherwise you might experience mould or little mushrooms starting to appear during the germination process.
10. When will I know when my plants are ready to harvest?
Your pop-out seed name will have an estimated harvest time. However, there are lots of factors that can influence how quickly a plant reaches maturity.
11. What are the Woolworths Discovery Garden seedling kits made of?
- Each seedling kit comes in a cardboard wrapper with useful information and instructions.
- The seed identifying label is made from cardboard.
- The pot is made of plant fibres.
- The soil pellet is made of coconut husk.
12. Which Woolworths Discovery Garden seedling kits help attract bees?
There are a number of different seeds that are known to help out some of our favourite pollinators: chives, cornflower, lemon balm, oregano, red basil, sage, thyme, aster, lavender, phacelia, poppy, salvia, Swan River daisy, zinnia, spring onion, cabbage, carrot, cherry tomatoes, lettuce, silverbeet and spinach. It could be a good idea to plant these next to your other growing herbs and vegetables to help them grow too.
Cover image source: Oliver Hoffmann/Shutterstock.com
This story has been updated. Originally published on 4 October 2019.
This article was reviewed by our Sub Editor Jacqueline Belesky before it was published, as part of our fact-checking process.
Follow Canstar on Facebook and X for regular financial updates.
→ Looking to find a better deal? Compare car insurance, car loans, health insurance, credit cards, life insurance, as well as home loans, with Canstar.

- I have collected a lot of Discovery Garden seedling kits – should I try and sprout them all at once?
- How do I work out which Discovery Garden seeds I should plant now?
- My Discovery Garden seedling kits have sprouted – what do I do with them now?
- How do I know when my Discovery Garden seedlings are right to plant in the ground or a pot?
- Some of my Discovery Garden seedling pots have mould on them. How can I treat that? Is it ok to plant them out like that?
- Do I need to feed my Discovery Garden seedlings?
- How often do I need to water my Discovery Garden plants?
- Discovery Garden: troubleshooting advice from Woolworths